
How to Get an ElevenLabs API Key: An Illustrated Guide for Anyone Embedding Voice AI into an App
Published on April 9, 2026
This article is the English translation of the Japanese original.

This article walks through how to obtain an API key for ElevenLabs, a well-known voice AI service, with screenshots at every step. It's designed for non-engineers who have been asked by a developer to "go grab an API key and send it over," so they can complete the task without getting stuck. Use it whenever you need to commission narration for auto-generated videos, or hand off the credentials needed to embed text-to-speech into a web service.
What Is ElevenLabs?
ElevenLabs is a voice AI generation service that converts text into natural-sounding audio (such as mp3). Because it ships with an API, you can embed text-to-speech features directly into web services and applications.
Common use cases:
- Narration generation for auto-generated videos
- Embedding text-to-speech features into web services
- In-app voice guidance and automatic announcements
ElevenLabs is a non-Japanese service, but Japanese voice samples are available, so it can read Japanese content naturally as well.
Before You Begin
You'll want to have the following ready:
- An email address or Google account (used for sign-up)
- A credit card (required when subscribing to a paid plan)
- The engineer's request details (which API key permissions are needed)
Step 1: Visit the ElevenLabs Official Site
First, head to the official site at https://elevenlabs.io/.
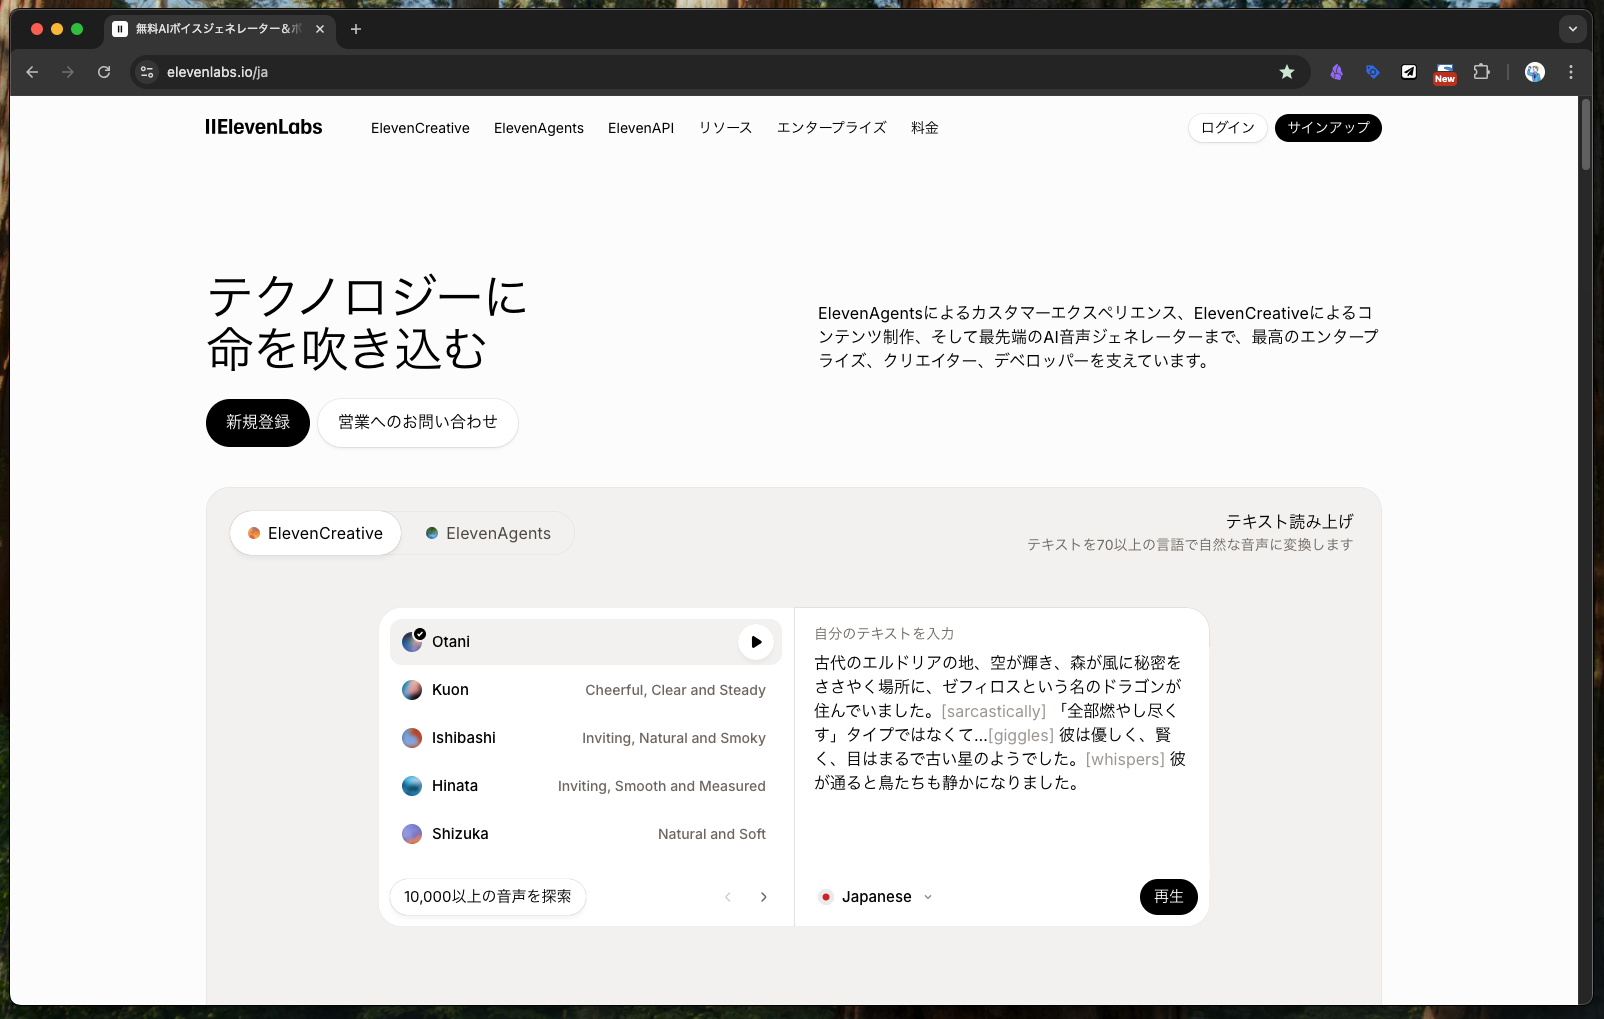 Step 1: First, visit the service site at https://elevenlabs.io/.
Step 2: Create an Account
Sign up using either a Google account or an email address — whichever you prefer.
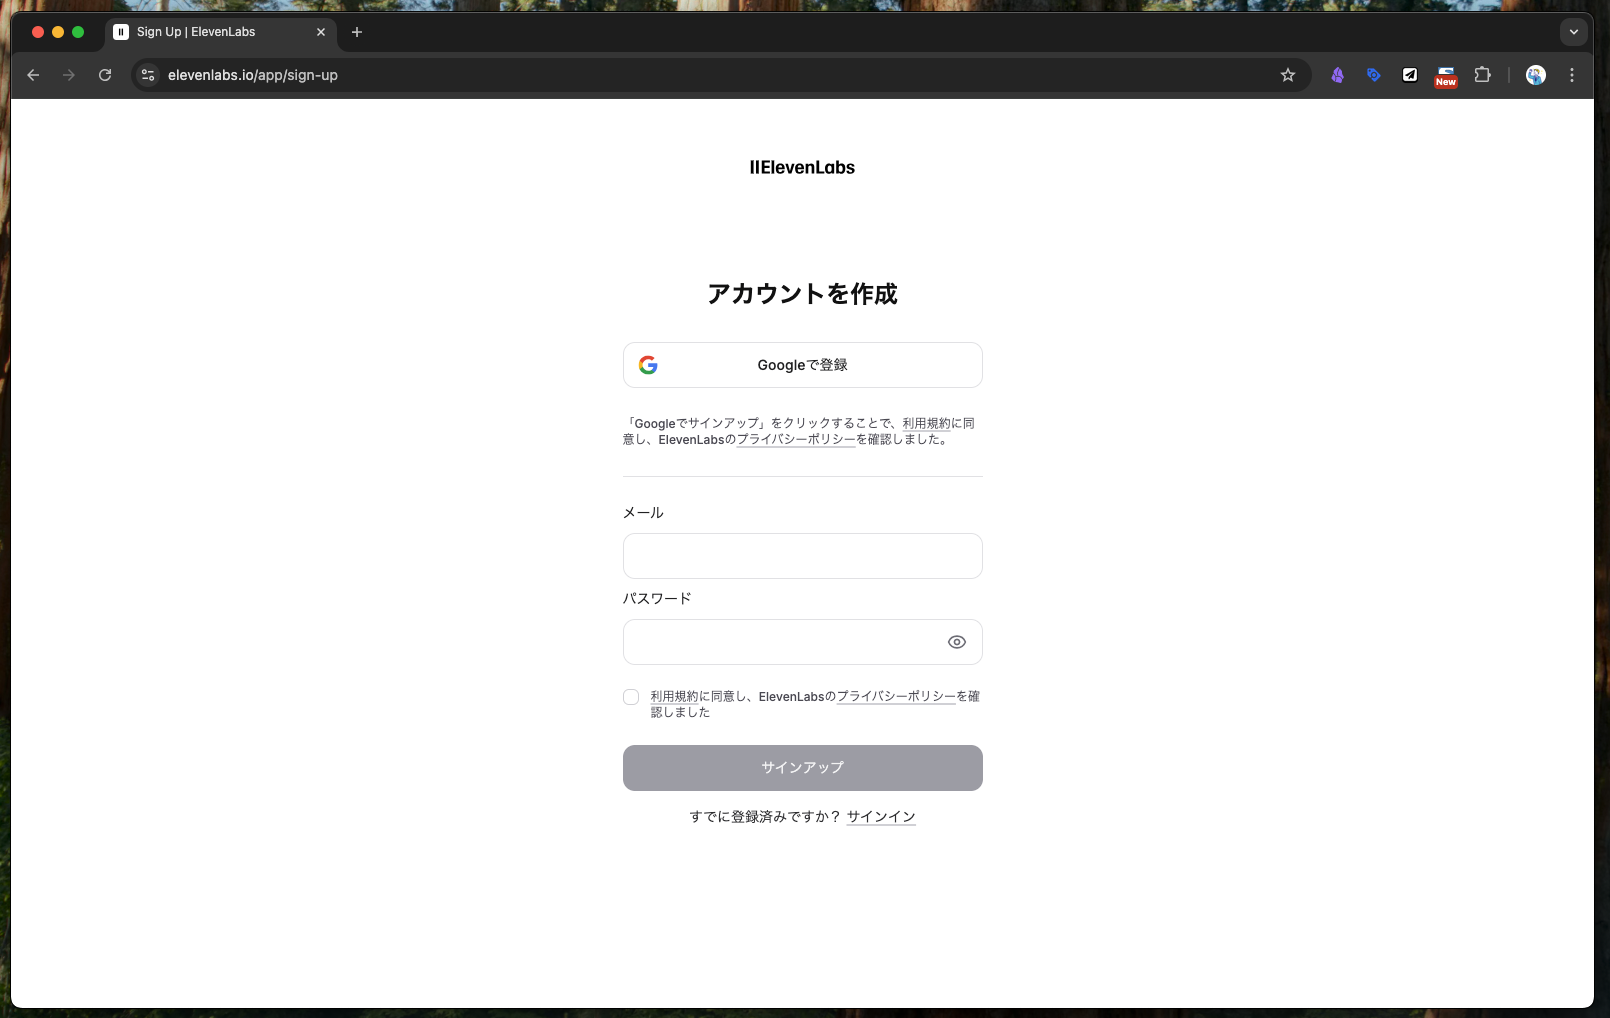 Step 2: Sign up using either a Google account or email address — whichever you prefer.
Step 3: Choose "ElevenAPI" as the Platform
A platform selection screen appears. Since the goal here is API usage, select ElevenAPI.
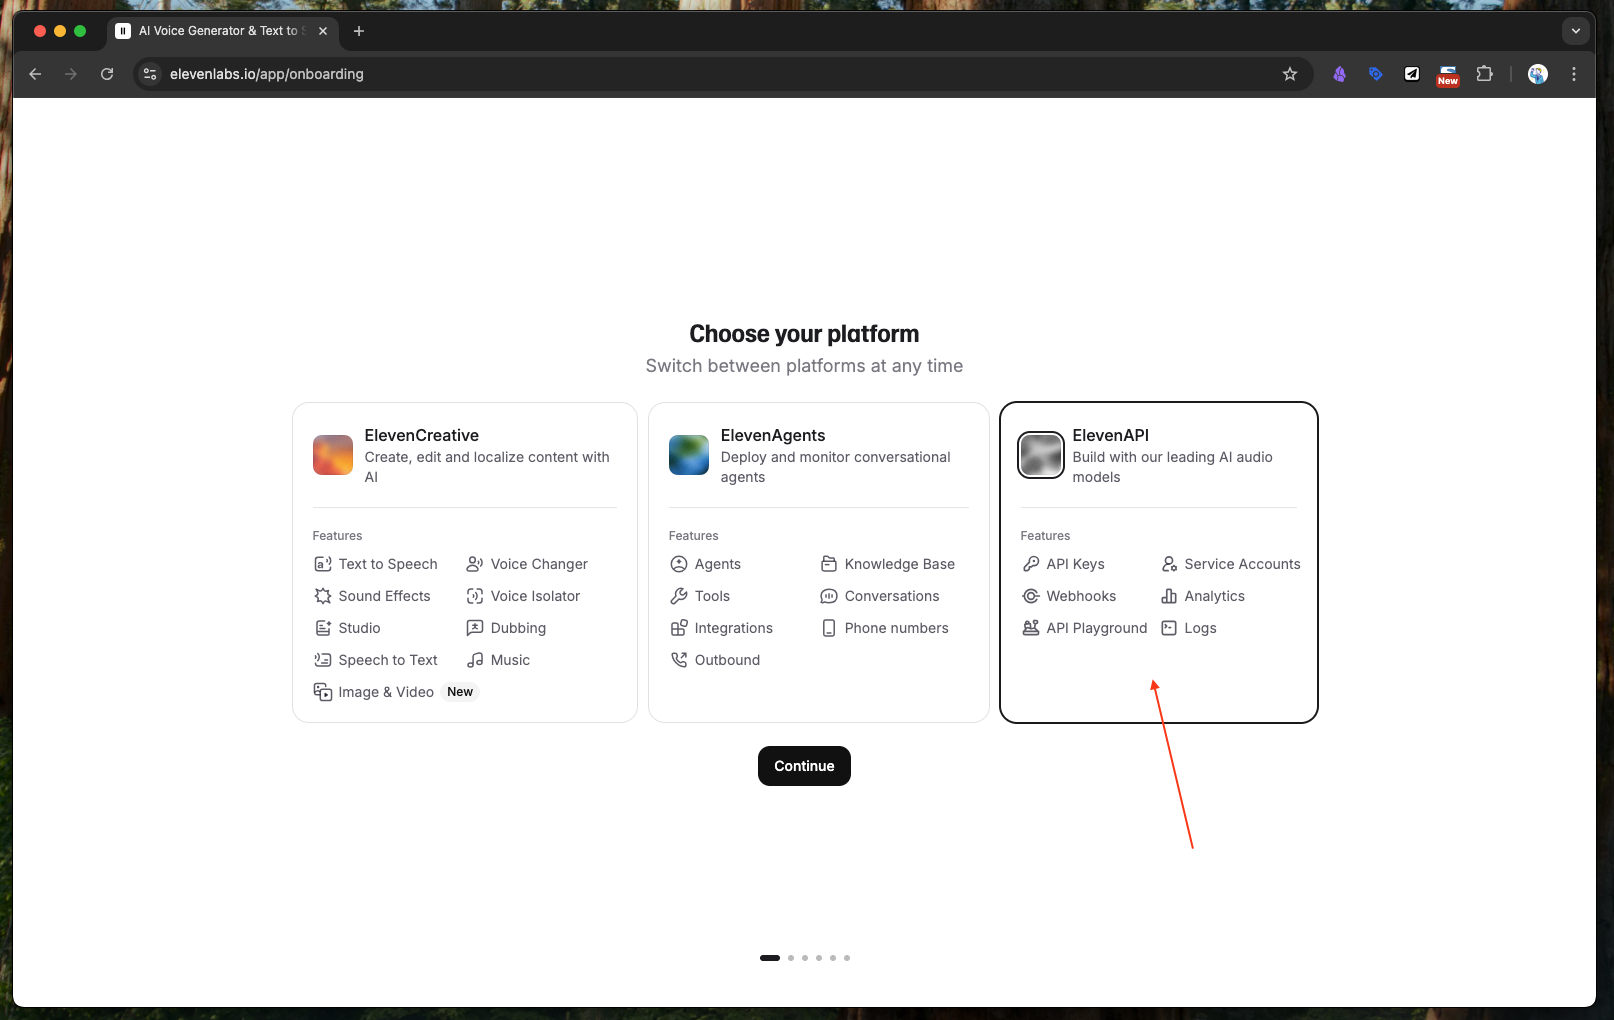 Step 3: Since this guide is about using the API, choose "ElevenAPI" as the platform.
Step 4: Answer the Survey
A short survey about your intended use appears. Pick the answers that fit your situation and continue.
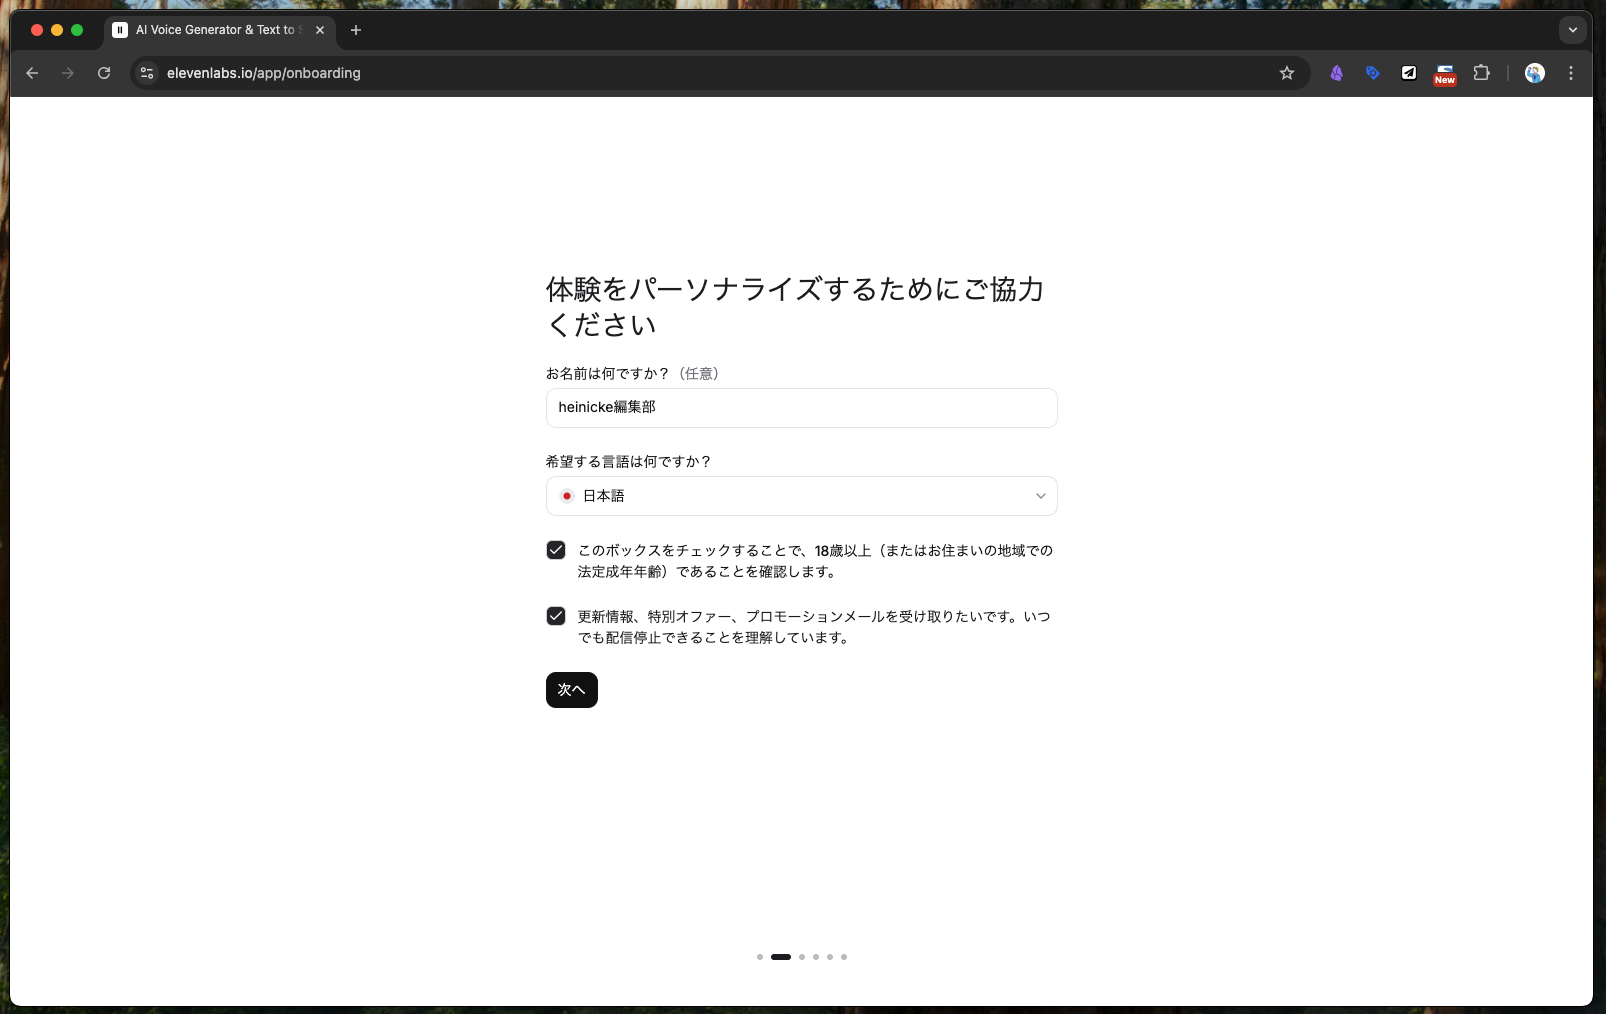 Step 4: Answer the survey.
Step 5: Choose a Plan
Select your subscription plan. Monthly and annual plans differ in both price and contract length, so review them carefully.
Recommended: If you're just trying it out, start with the monthly plan rather than committing to an annual contract.
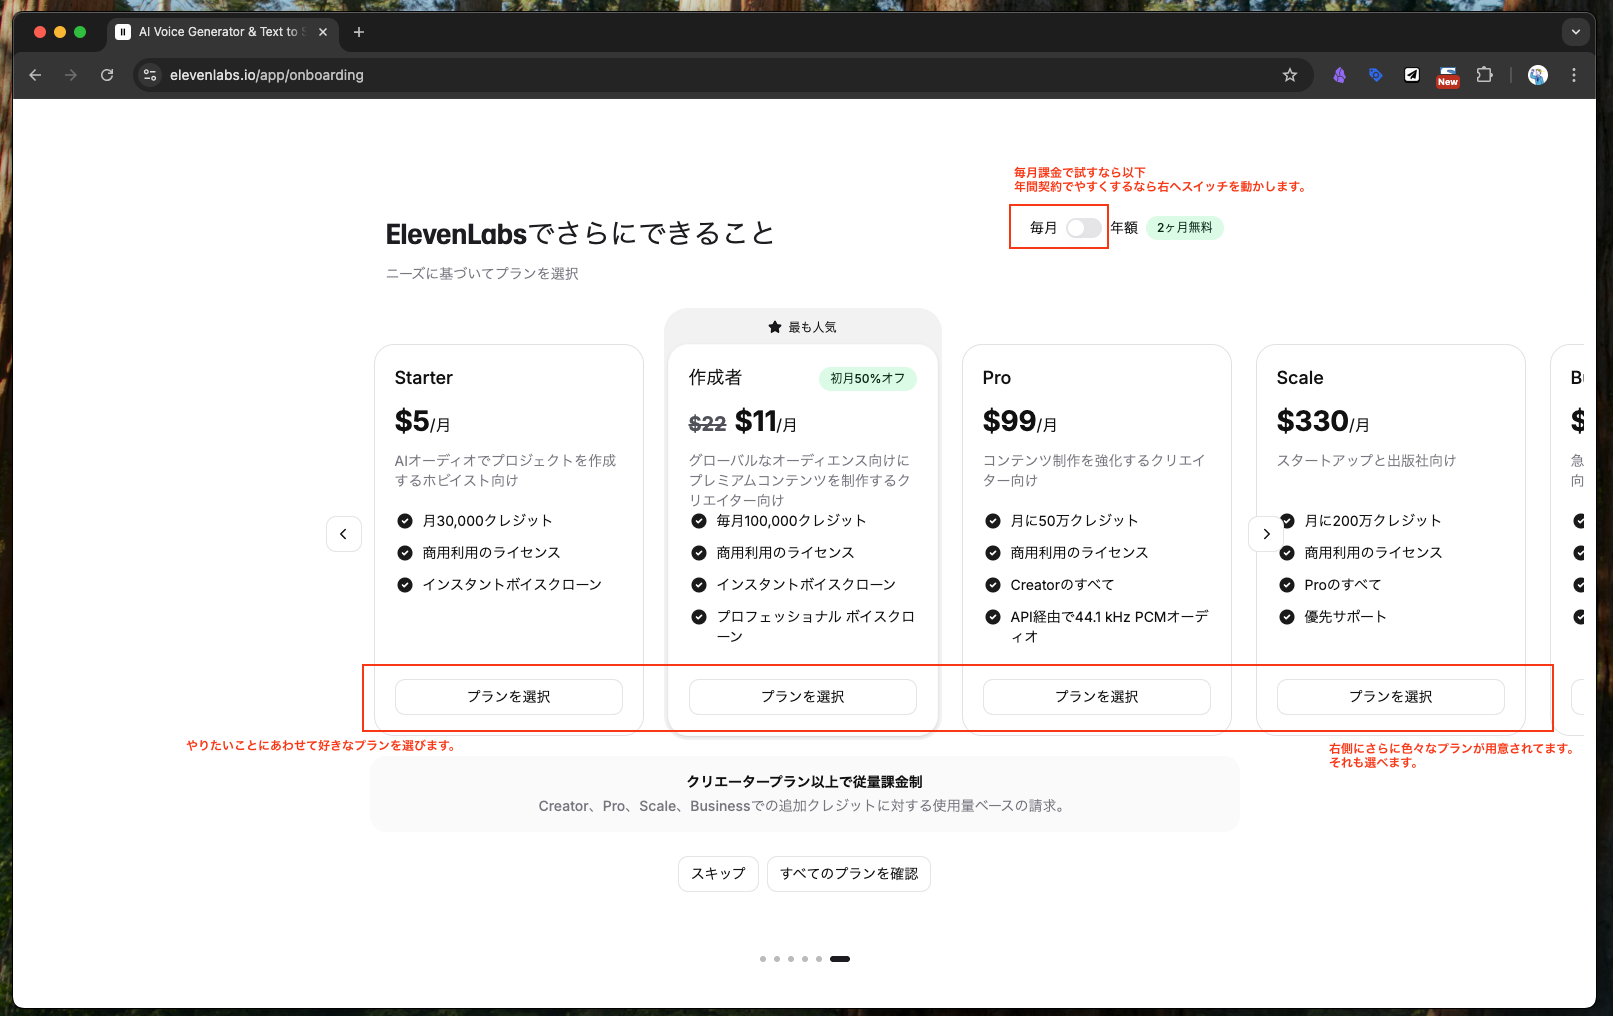 Step 5: Choose your plan. Monthly and annual contracts differ in price and contract length, so choose carefully. For trial use, the monthly plan is recommended over an annual contract.
Step 6: Pay by Credit Card
Payment is processed via Stripe as a credit card subscription. Enter your card details and click the Subscribe button.
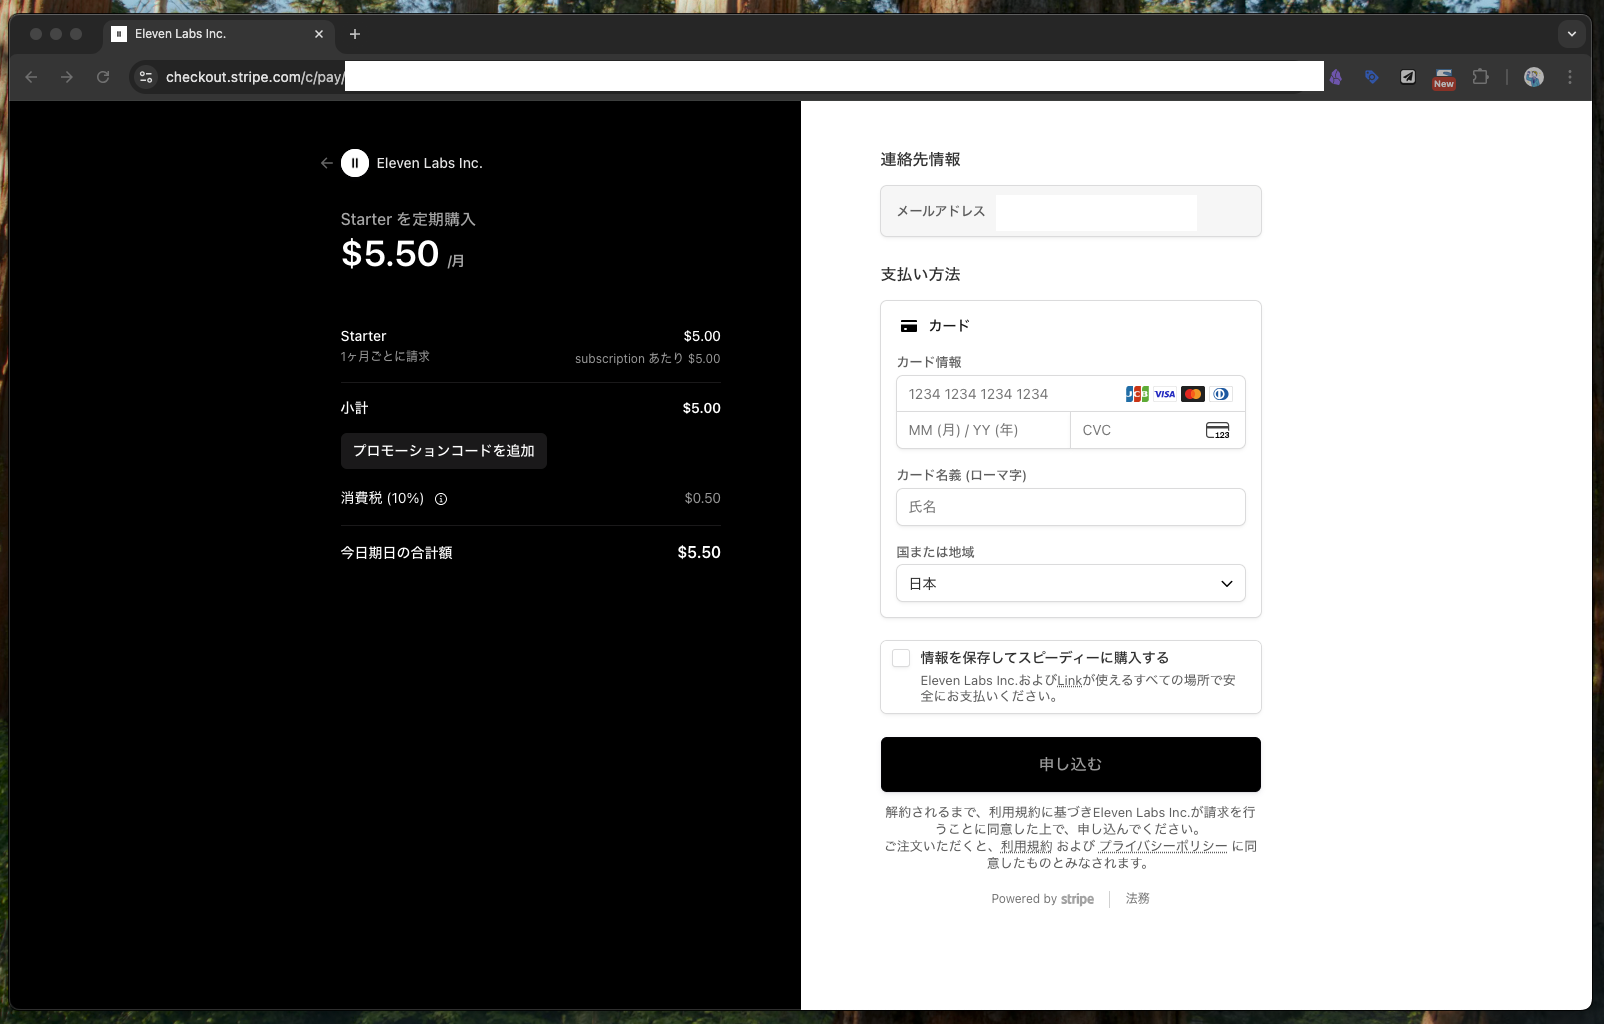 Step 6: Payment is via Stripe credit card billing. Enter your credit card details and click "Subscribe."
Step 7: Confirm the Subscription Plan
The subscription plan page appears. Double-check that the plan details are correct.
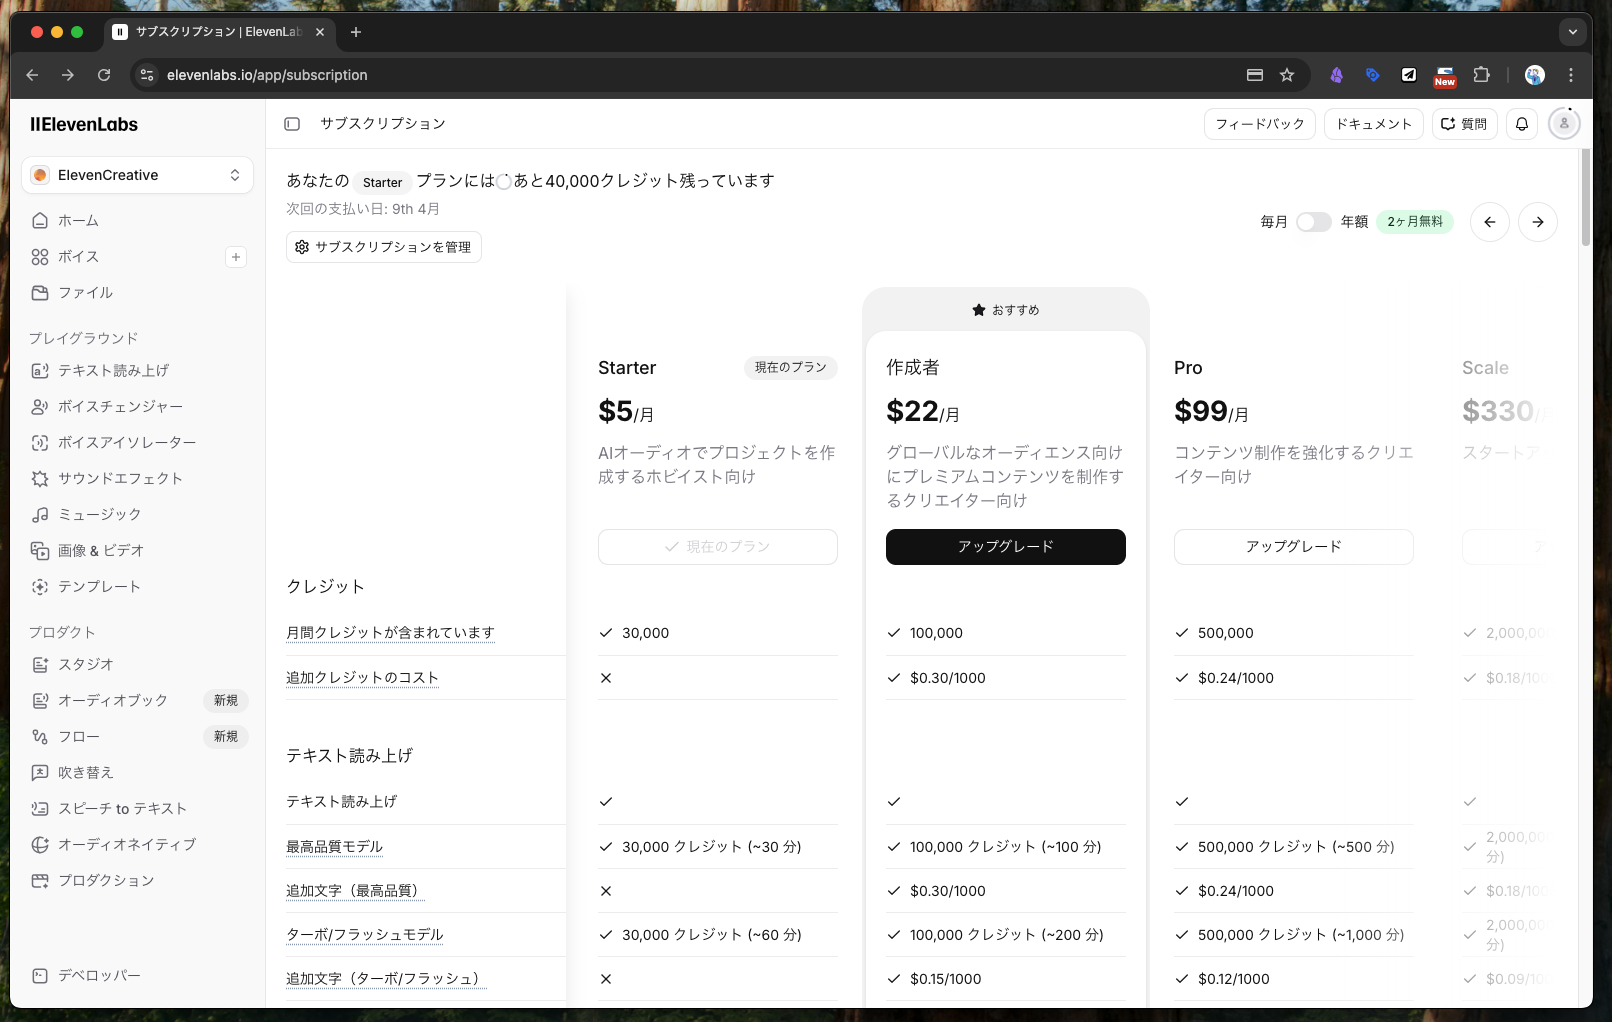 Step 7: The selected subscription plan page appears.
Step 8: Go to the Dashboard (Home)
Click Home in the left sidebar to go to the main dashboard after login. This is the starting point for all management tasks.
 Step 8: Click "Home" in the left sidebar to reach the main dashboard after login. This is the management starting point.
Step 9: Open "Developers"
Click Developers at the bottom of the left sidebar. This is where you access API-related settings.
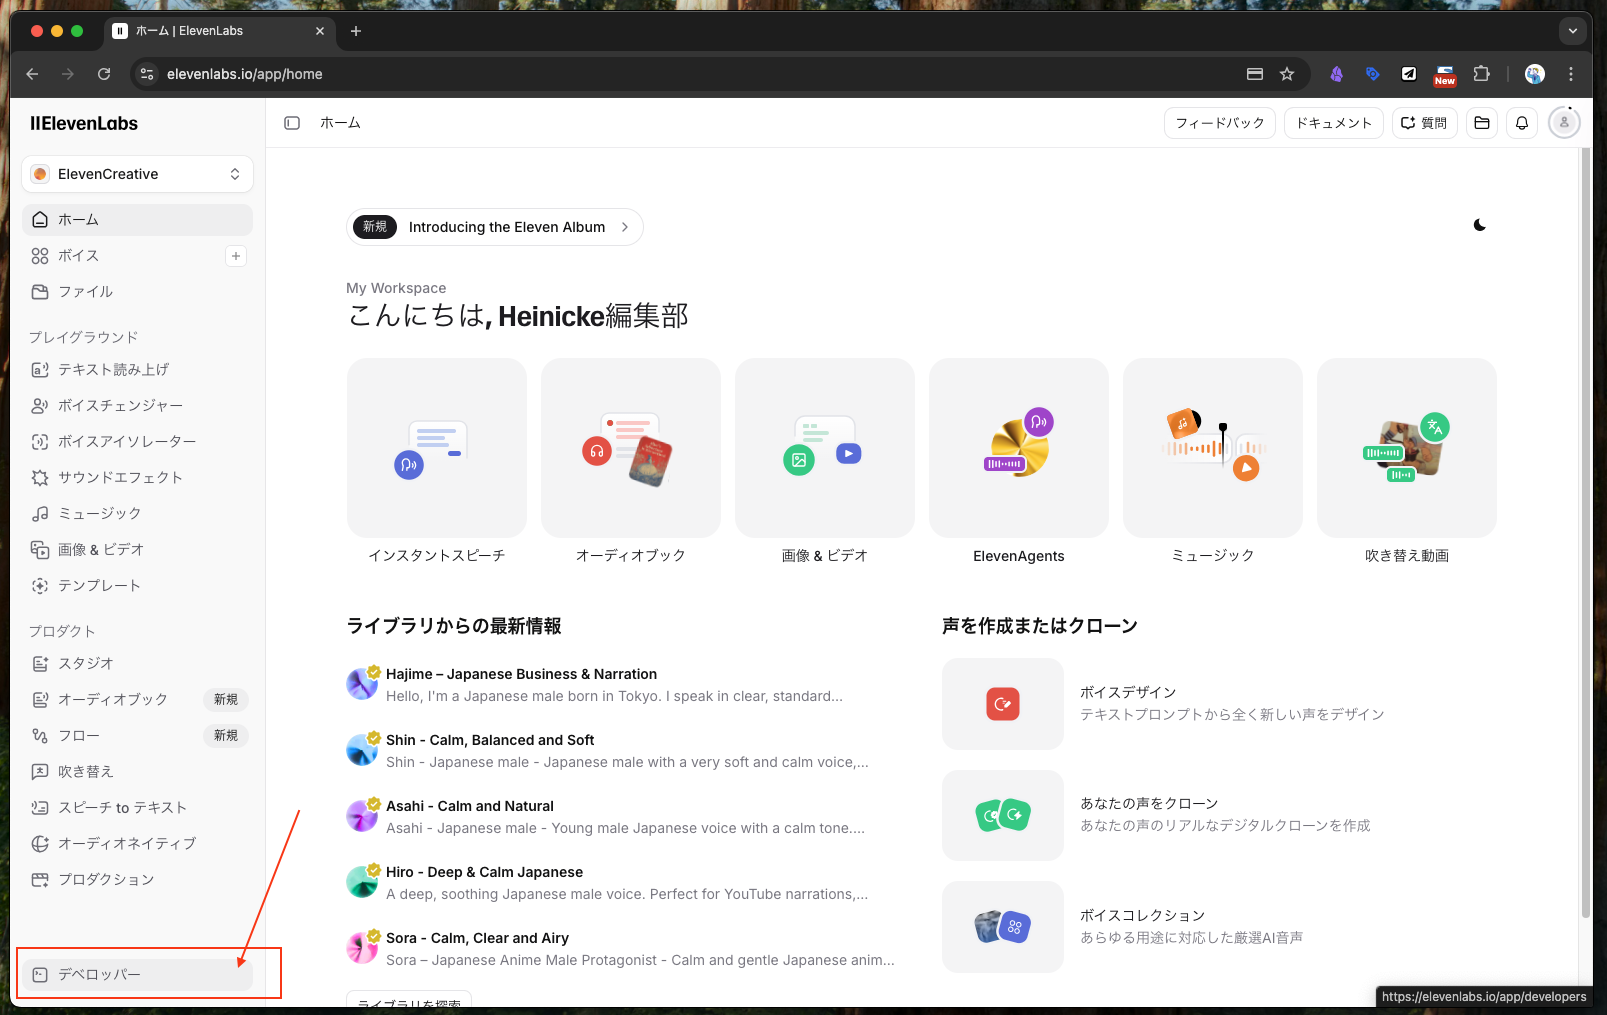 Step 9: Click "Developers" at the bottom of the left sidebar.
Step 10: Open the "API Keys" Tab
On the Developers page, click the API Keys tab.
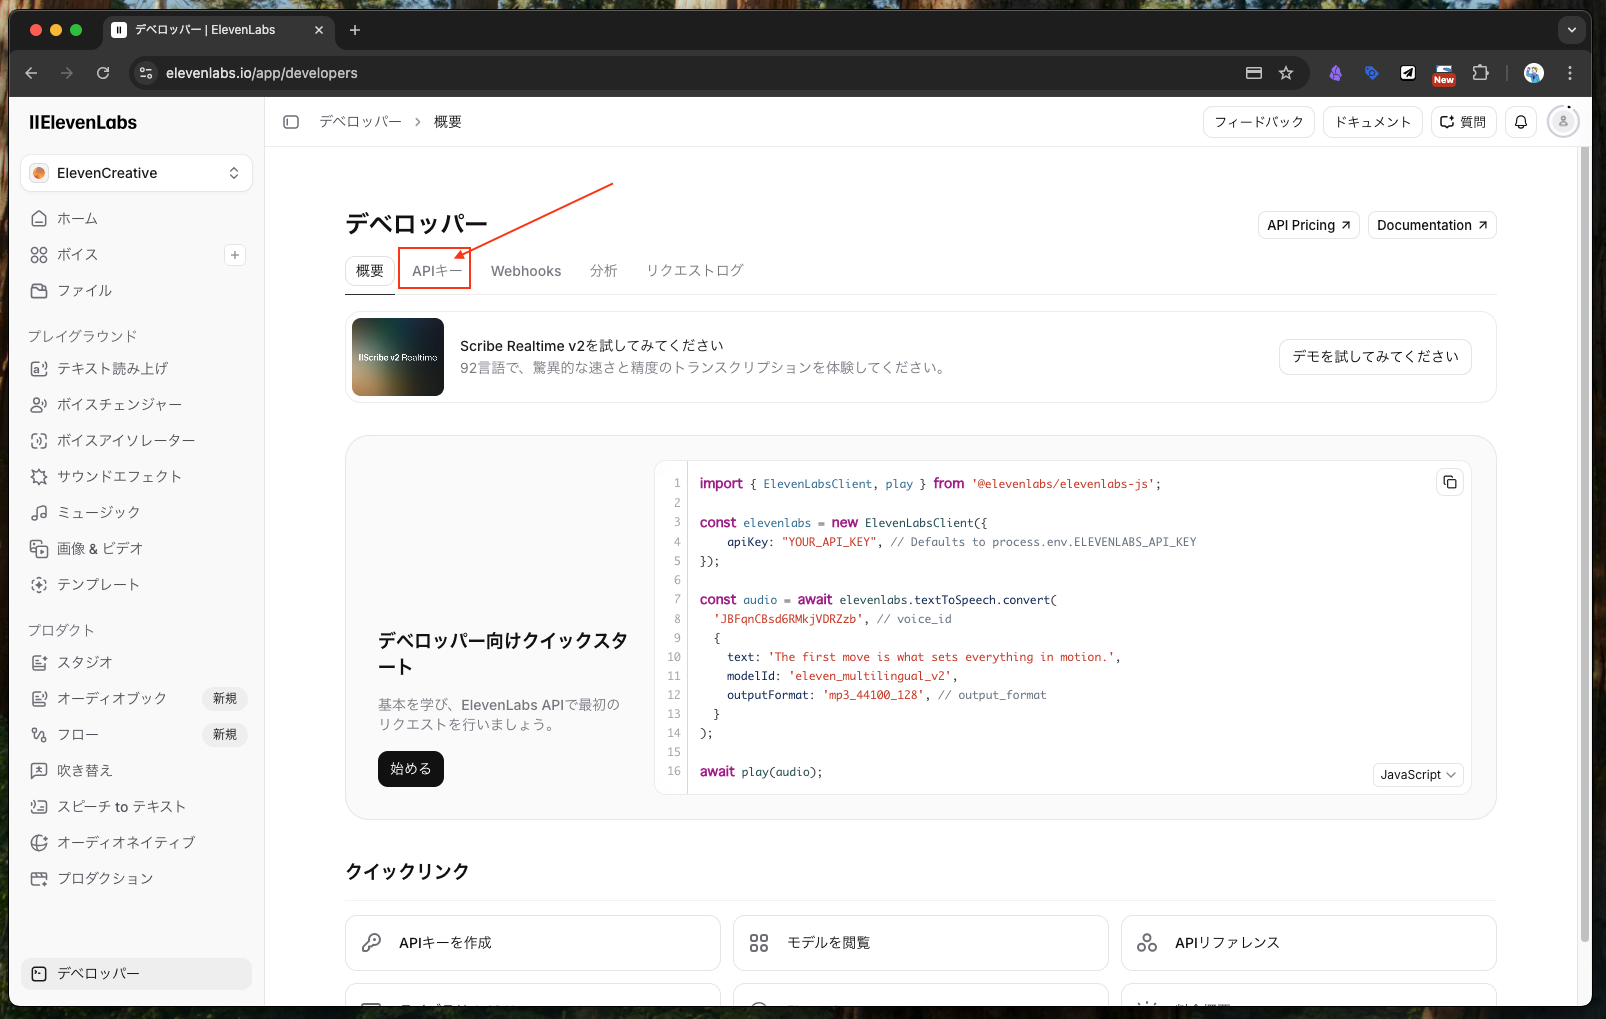 Step 10: Click the "API Keys" tab.
Step 11: Create a New Key
Click the + Create Key button.
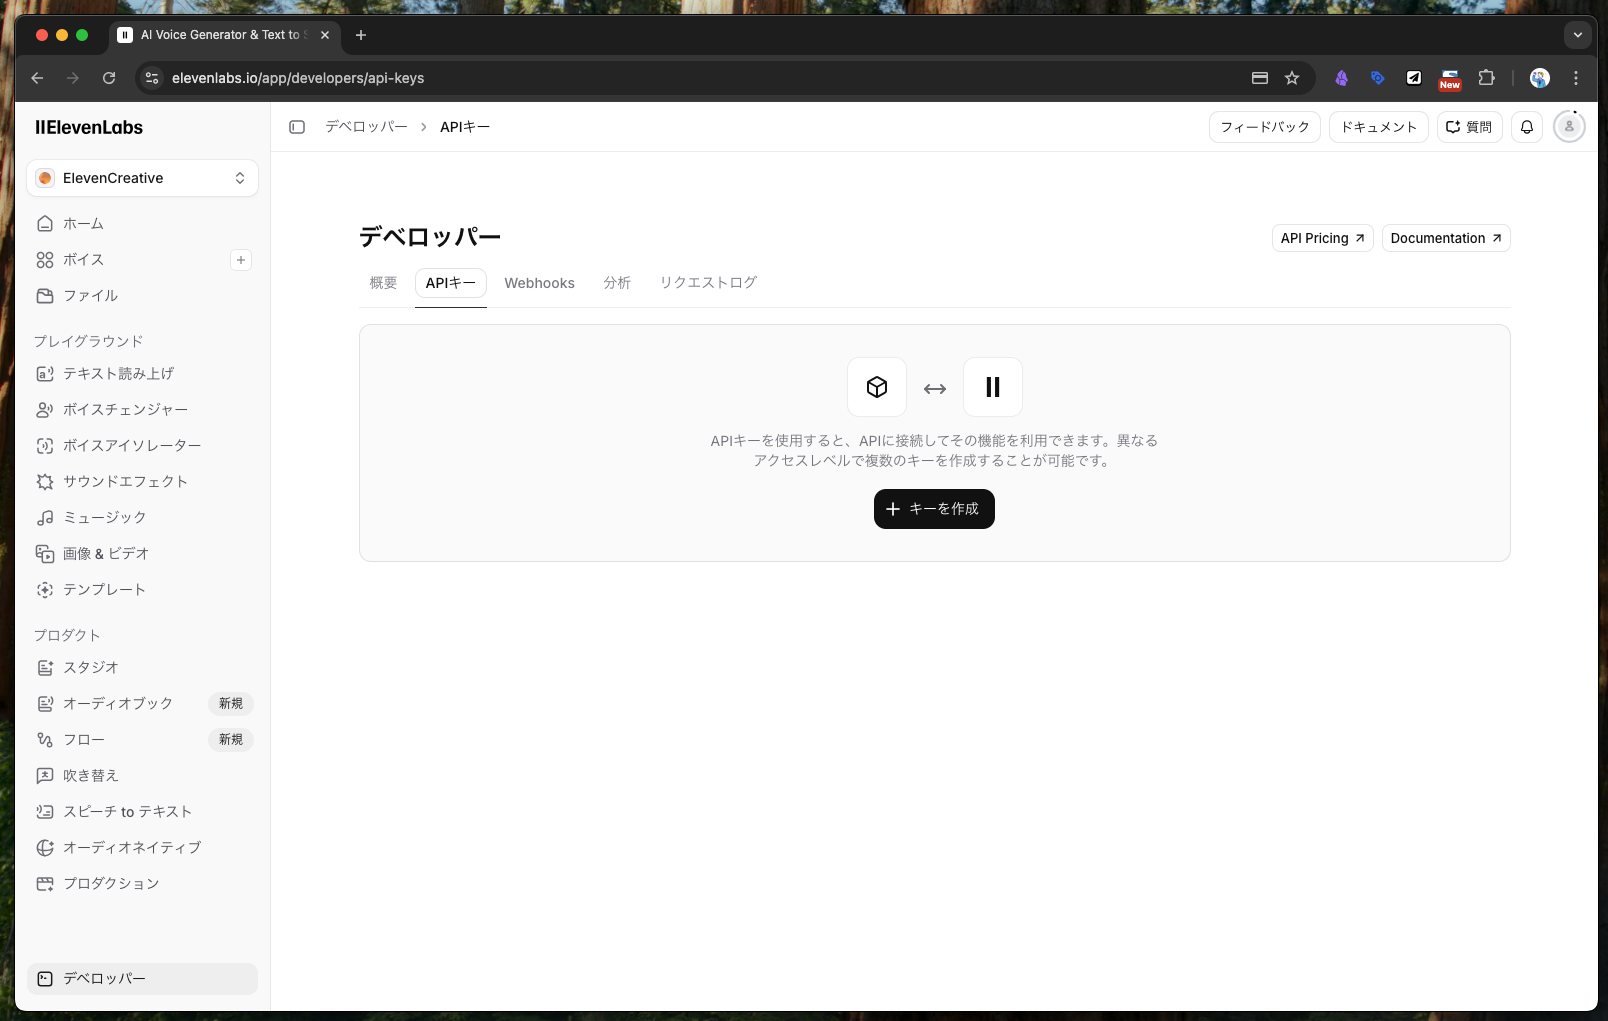 Step 11: Click the "+ Create Key" button.
Step 12: Set Usage Limits and Permissions
When creating the key, you can configure both a usage limit and permissions. For safety, keep both as restrictive as possible.
- Billing limit: Set a cap to prevent unexpectedly large charges
- Permissions: Grant
Accessonly to the features you actually need; leave everything else asNo access
In this guide we only need text-to-speech, so set Text to Speech to Access and leave the rest as No access. Then click the Create Key button.
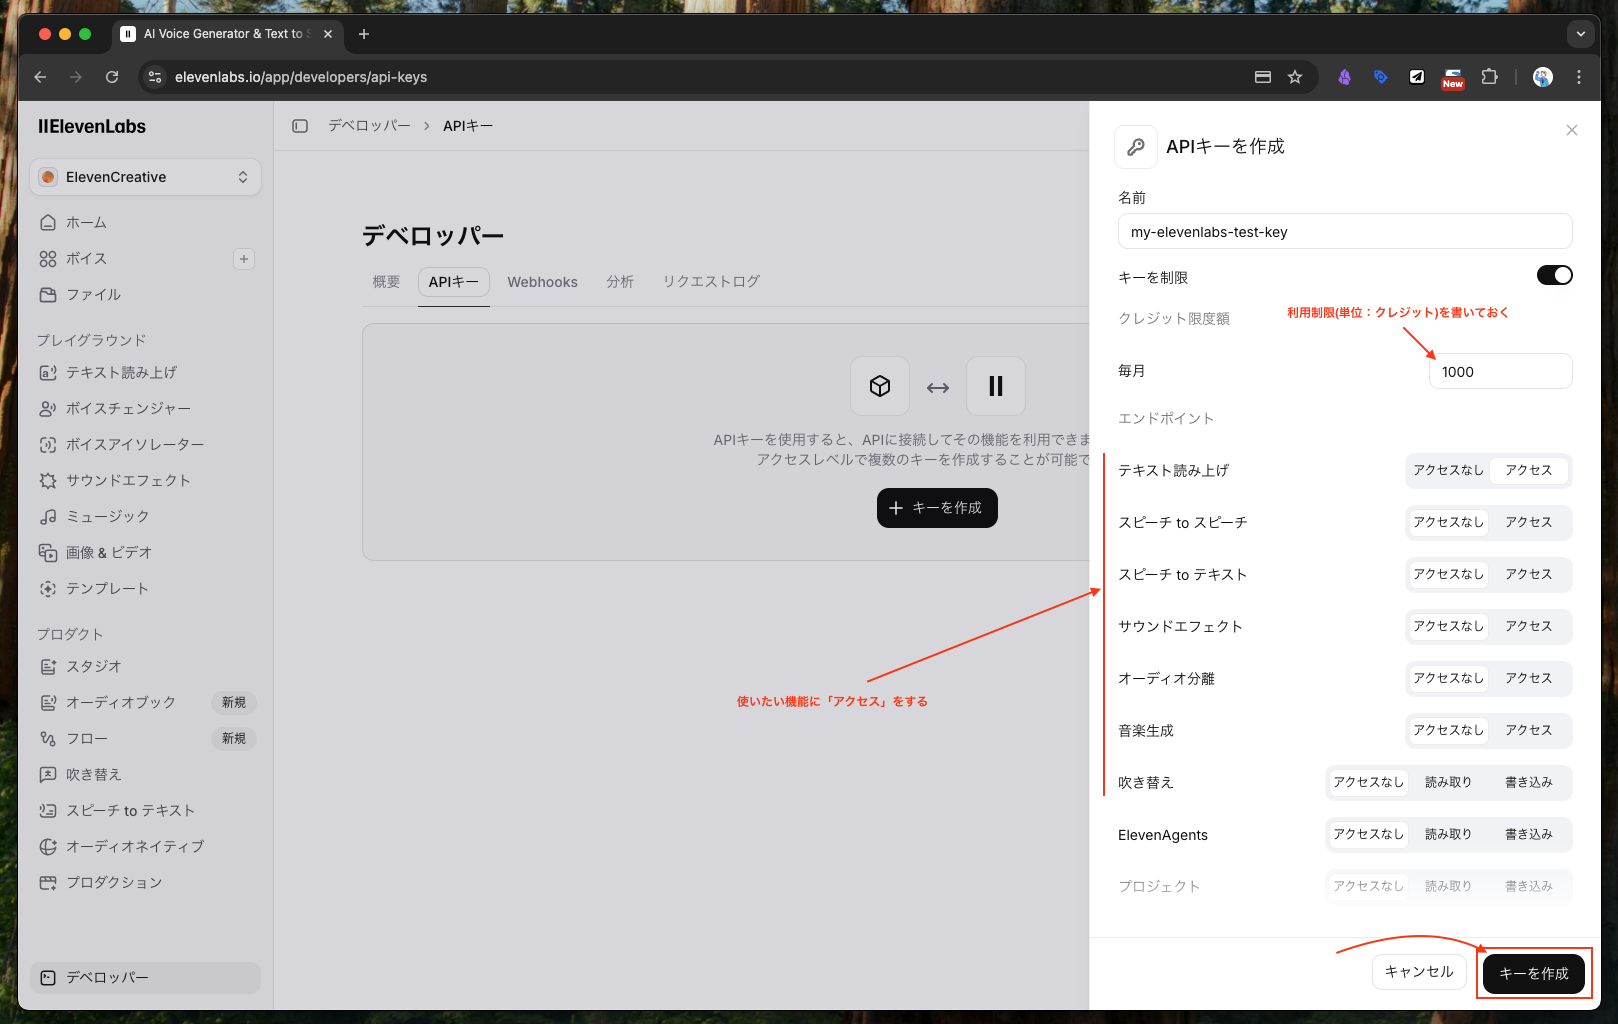 Step 12: Set a usage limit so that you don't get billed beyond a safe range, and grant only the permissions you actually need. Since this guide only uses Text to Speech, set "Text to Speech" to "Access" and leave the rest as "No access," then click "Create Key."
Step 13: Copy the API Key and Hand It to the Engineer
The API key has been generated. Copy it and store it somewhere safe.
Important: When handing the key over to an engineer, avoid leak-prone channels like chat tools. Use whatever secure delivery method the engineer specifies — a password manager, encrypted email, a secrets management service, etc.
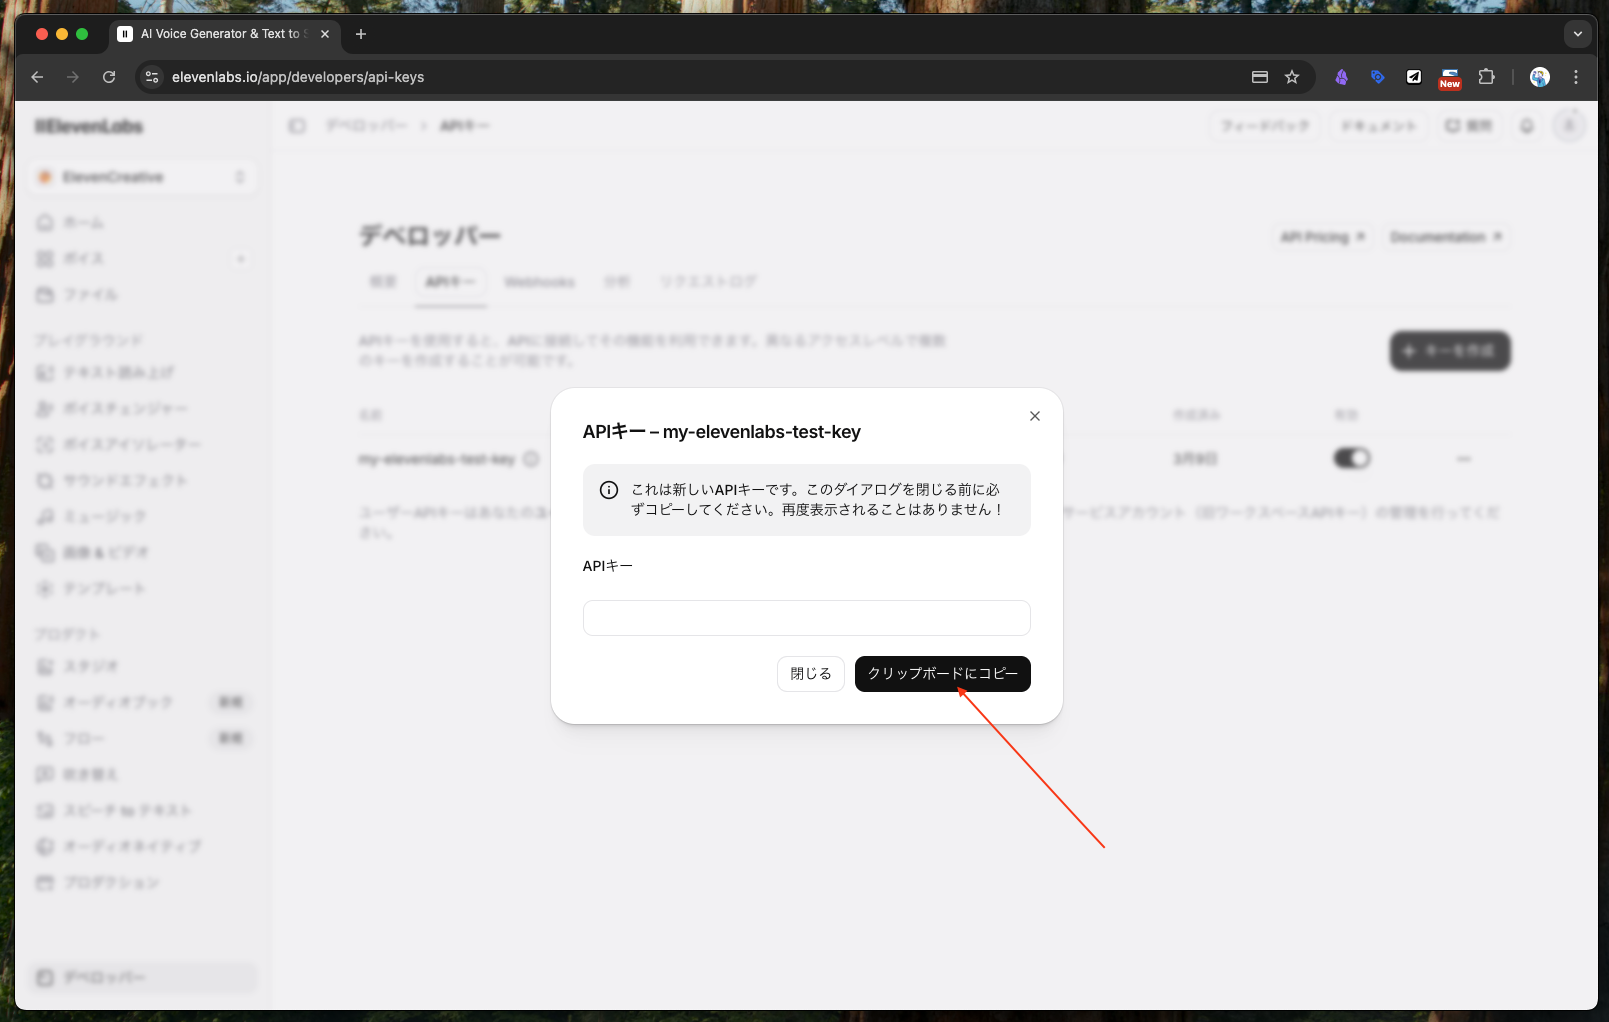 Step 13: The API key is ready. Copy and save it. Rather than passing it through risky channels like chat tools, hand it to the engineer using whatever method they specify — that's the safer choice.
Summary
Here's a recap of the ElevenLabs API key acquisition flow:
- Account registration (Steps 1–2)
- Platform and plan selection (Steps 3–5)
- Credit card payment (Steps 6–7)
- Navigate from the dashboard to the Developers → API Keys screen (Steps 8–10)
- Create the key and configure permissions and limits (Steps 11–12)
- Hand the API key to the engineer through a secure channel (Step 13)
In particular, the usage limits and permissions in Step 12 and the secure handoff in Step 13 are critical from both a cost-management and security standpoint. Choose the appropriate permissions based on the engineer's request.
Service Information
| Item | Detail |
|---|---|
| Official site | https://elevenlabs.io/ |
| Main use cases | Text-to-speech (TTS) API, automatic video narration, embedding voice features into web services |
| Supported languages | Multilingual including Japanese (Japanese voice samples available) |
| Billing | Stripe-based subscription (monthly / annual) |
Gallery