
【Illustrated Guide】How Product Managers Can Get a Claude API Key
Published on March 16, 2026
This article is the English translation of the Japanese original.

"Have you ever been told by an engineer to 'get us an API key' and didn't know where to start?" — For Product Managers (PMs) who collaborate with development teams, obtaining an API key is a surprisingly common task. This guide walks you through the step-by-step process of getting an API key for Claude, Anthropic's AI assistant, with screenshots at every stage. No coding knowledge required.
 The Anthropic Console login and sign-up screen
What Is an API Key?
An API key is essentially an authentication password for accessing an external service via a program. When an engineer integrates Claude's capabilities into a system, the API key proves that the request is coming from an authorized user.
When PMs know how to obtain an API key, they can communicate more smoothly with engineers and help speed up development.
What You'll Need
- An email address (for account registration)
- A credit card (for API usage billing — introduced in Step 17)
Step 1: Create an Account on the Anthropic Console
Start by accessing the Anthropic developer console — the management dashboard for Claude.
Visit: https://console.anthropic.com/
If this is your first time, register here. Enter your email address to create an account.
The sign-up screen — enter your email address to create an account
Step 2: Register Your Organization Name
During registration, you will be asked for an Organization Name — the display name used in the management dashboard. You can use your company name, a project name, or anything recognizable. It can be changed later.
 Enter an organization name — any recognizable name will do
Step 3: Select Your Account Type
Choose whether you are an individual (including sole proprietors) or an organization (company or other entity). Select the one that fits your situation.
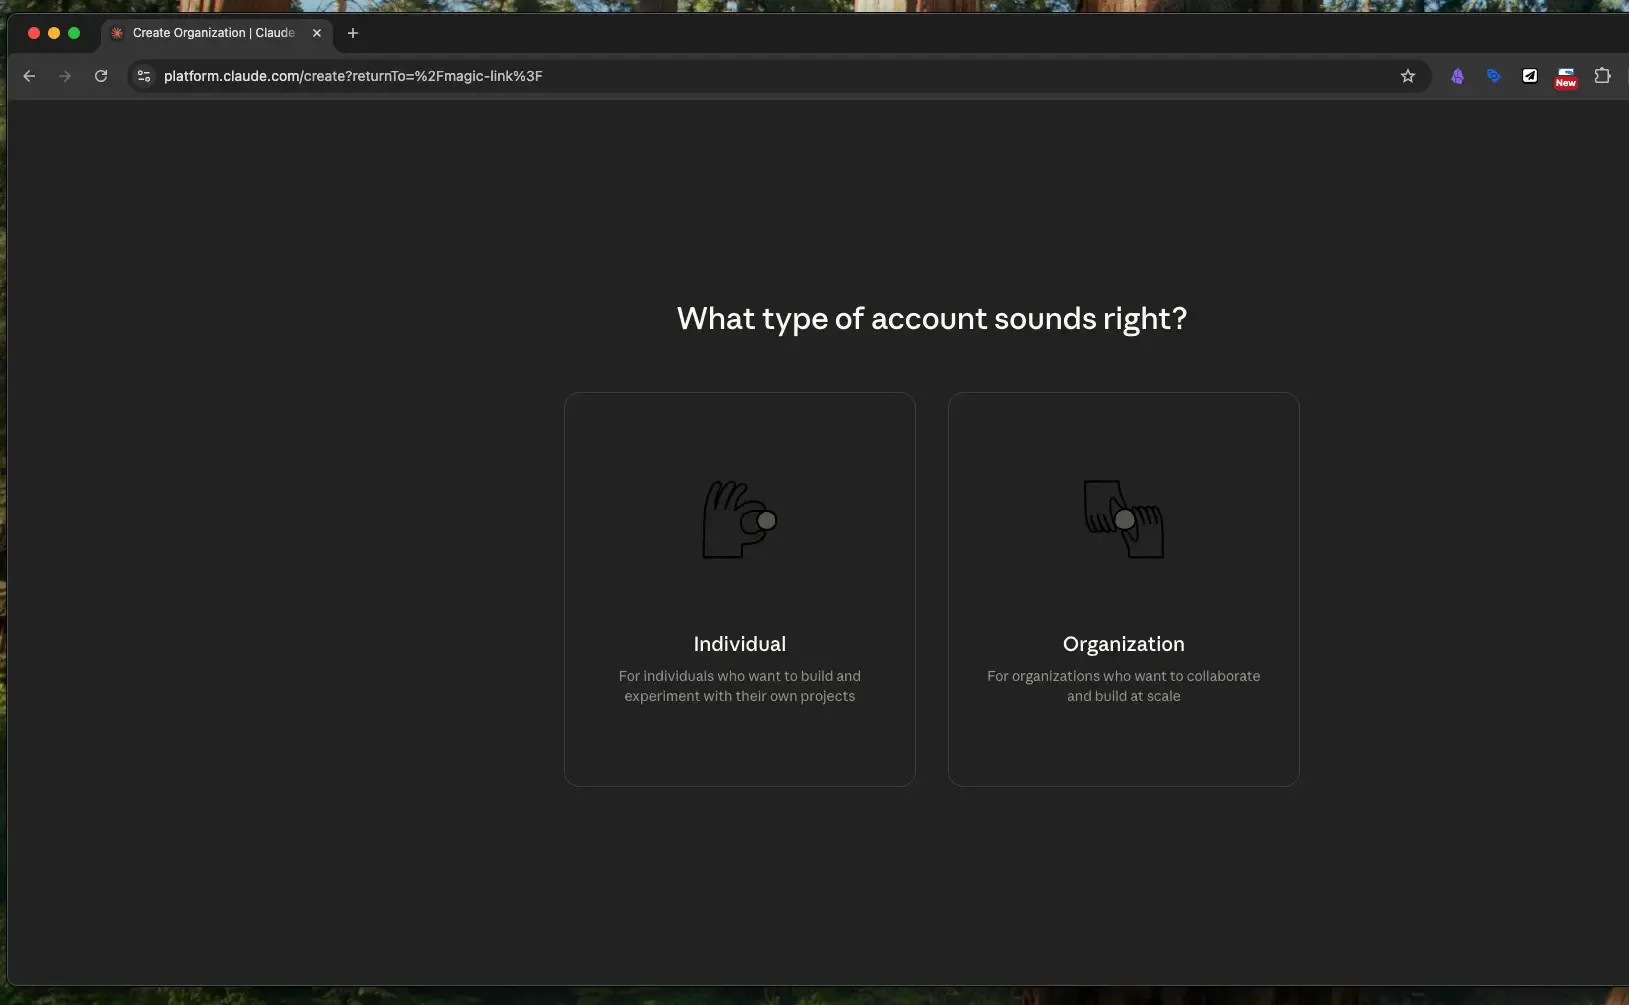 Select individual or organization use
Step 4: Complete a Short Survey
Answer a brief survey about your intended use. It is multiple choice — just select what applies.
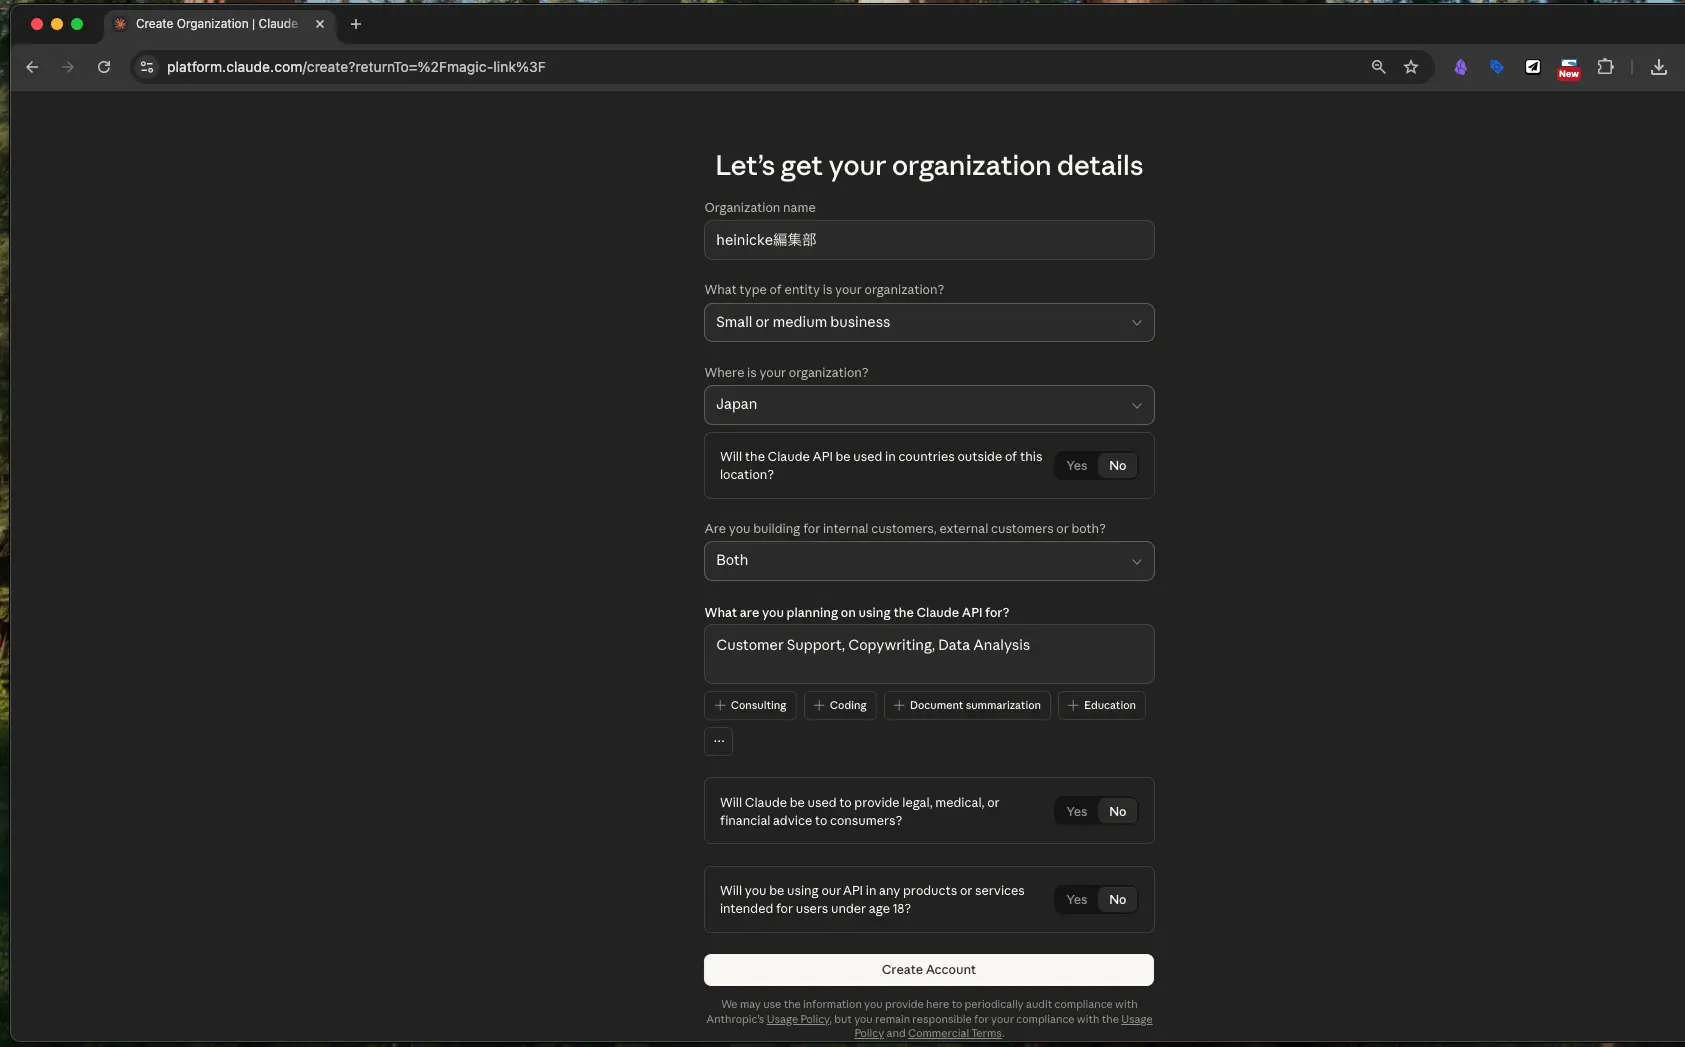 A usage survey — select what applies
Step 5: Registration Complete — Dashboard Appears
Once registration is complete, you will be taken to the dashboard — the Anthropic Console homepage.
 Registration complete — the dashboard is now visible
Step 6: Open "API Keys" from the Sidebar
Click "API keys" in the left sidebar to navigate to the API key management page.
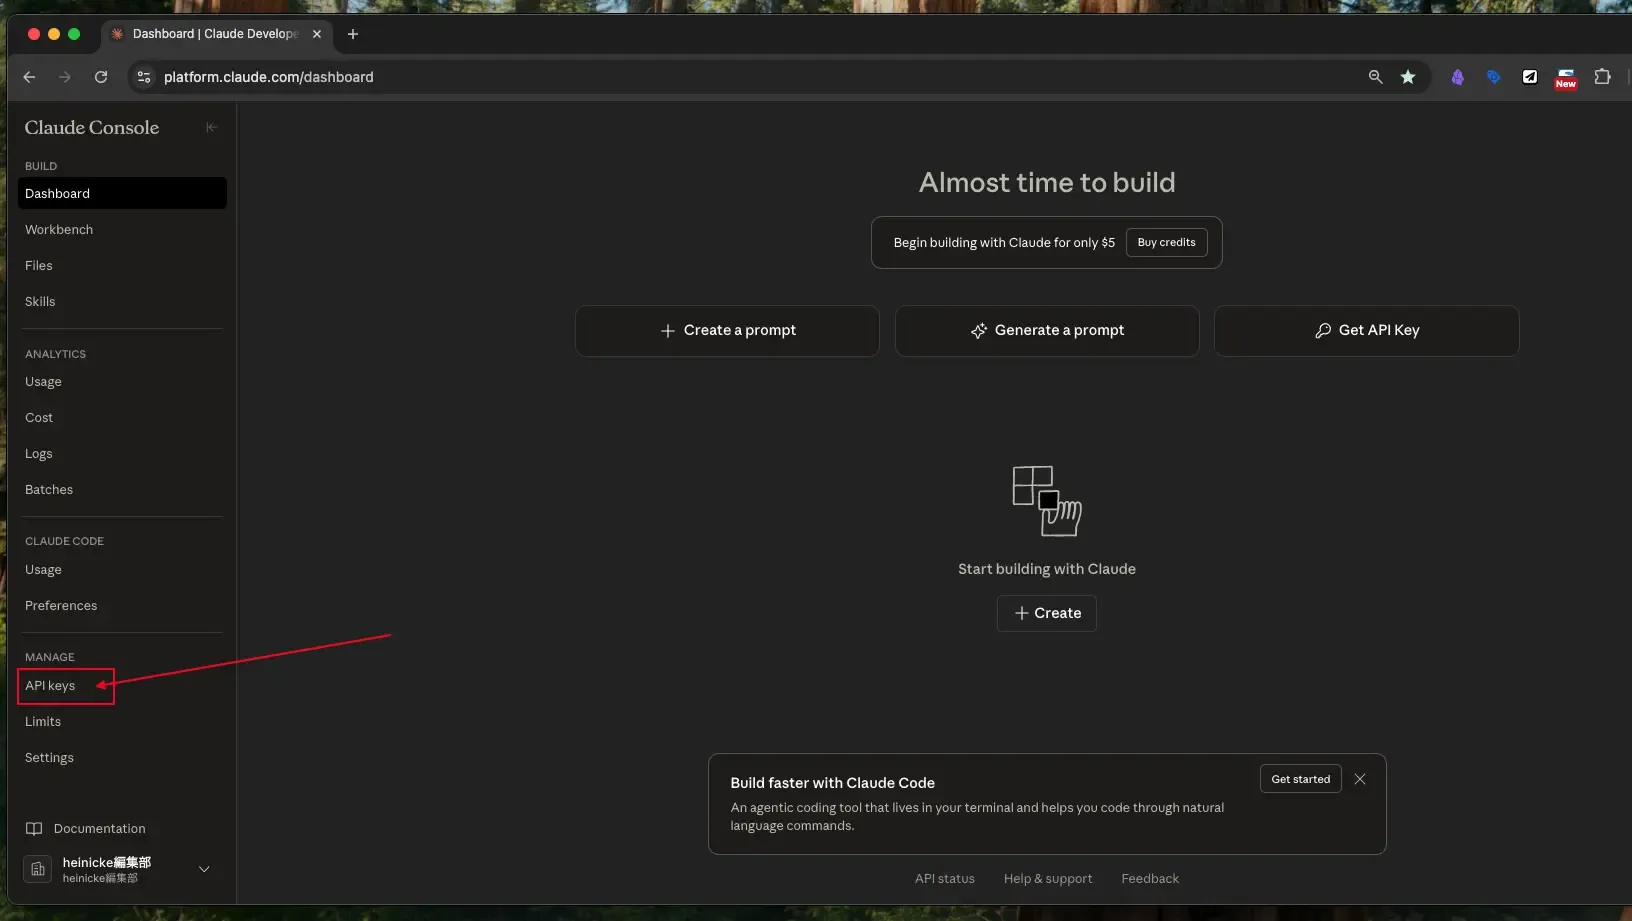 Click "API keys" in the left sidebar
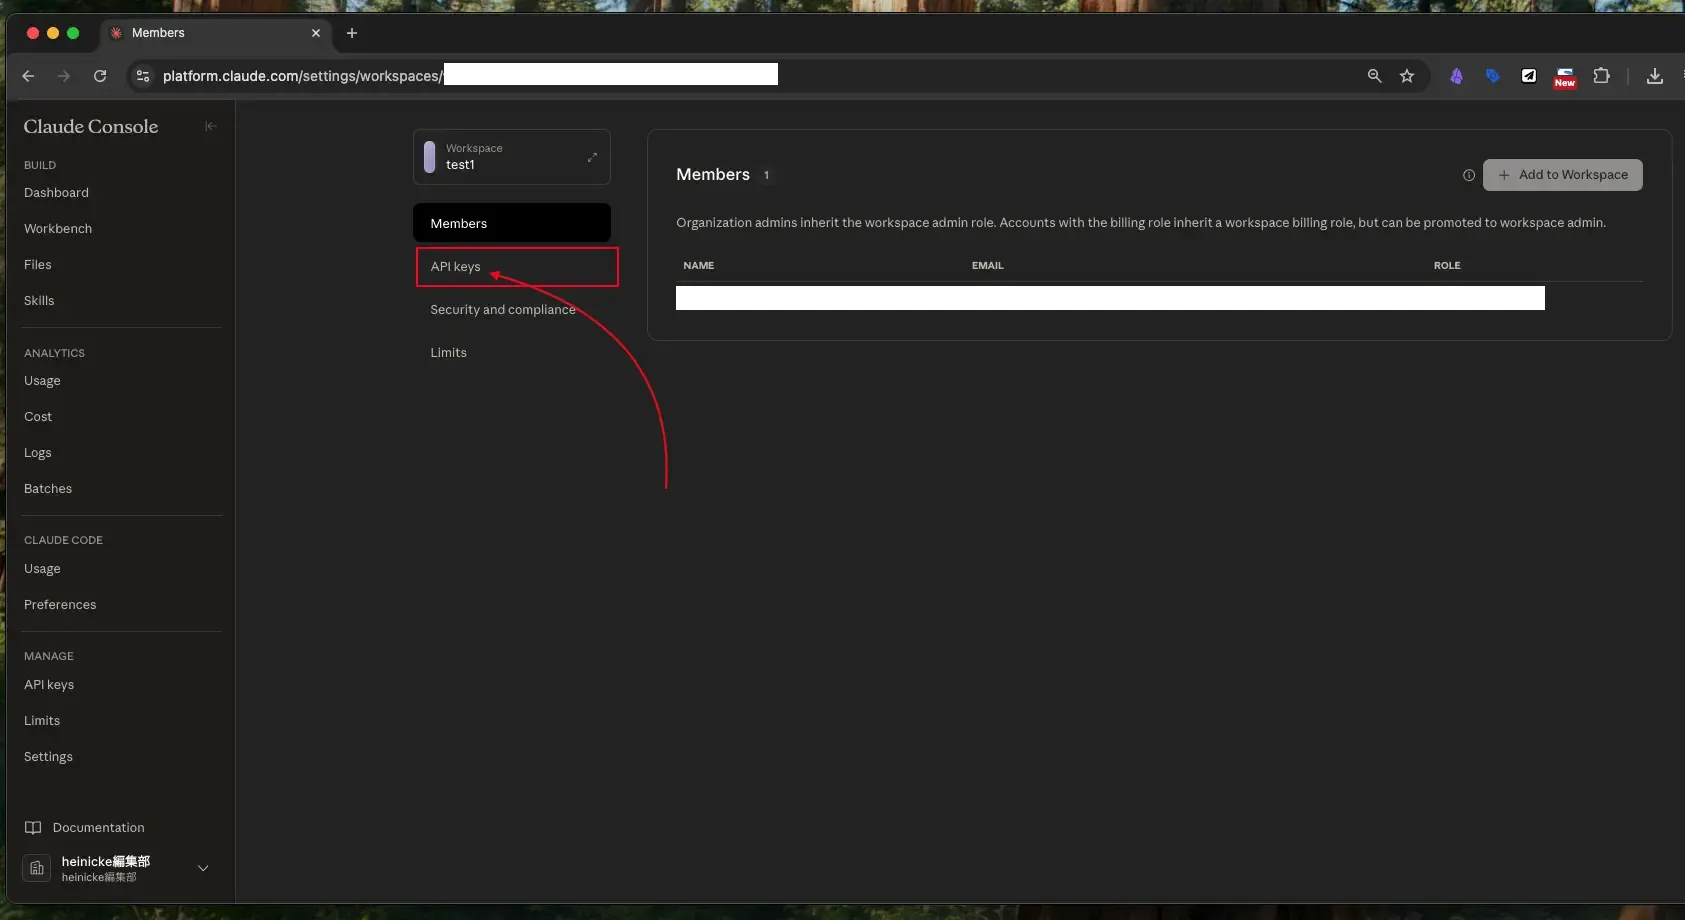
Step 7: Open "Workspaces"
Next, click "Workspaces."
A workspace lets you manage API keys separately for different projects or use cases — for example, separating "internal tools" from a "customer-facing service." This makes it easier to track usage and control costs.
 Click "Workspaces" to navigate to the workspace management screen
Step 8: Create a New Workspace
Click the "+Add Workspace" button.
 Click "+Add Workspace" to create a new workspace
Step 9: Name Your Workspace
Enter a name for the workspace. A descriptive name such as marketing-tool or customer-support makes it easier to manage. The Geo (region) field currently only allows "US" — this is fine to leave as-is.
 Set the workspace name and region — "US" is the only available Geo option
Step 10: Workspace Created
Your workspace has been created. In this example, it is named "test1."
 The workspace named "test1" has been created
Step 11: Select the Workspace You Created
Click the workspace you just created to enter it.
 Click on the workspace you created
Step 12: Open "API Keys" Inside the Workspace
Once inside the workspace, click "API keys."
 Click "API keys" inside the workspace
Step 13: Create a New API Key
Click the "+Create Key" button to begin generating an API key.
 Click "+Create Key" to generate an API key
Step 14: Enter a Name and Click "Add"
Give the API key a descriptive name so you know which project it belongs to. Alphanumeric characters with hyphens (-) or underscores (_) are recommended. When done, click "Add."
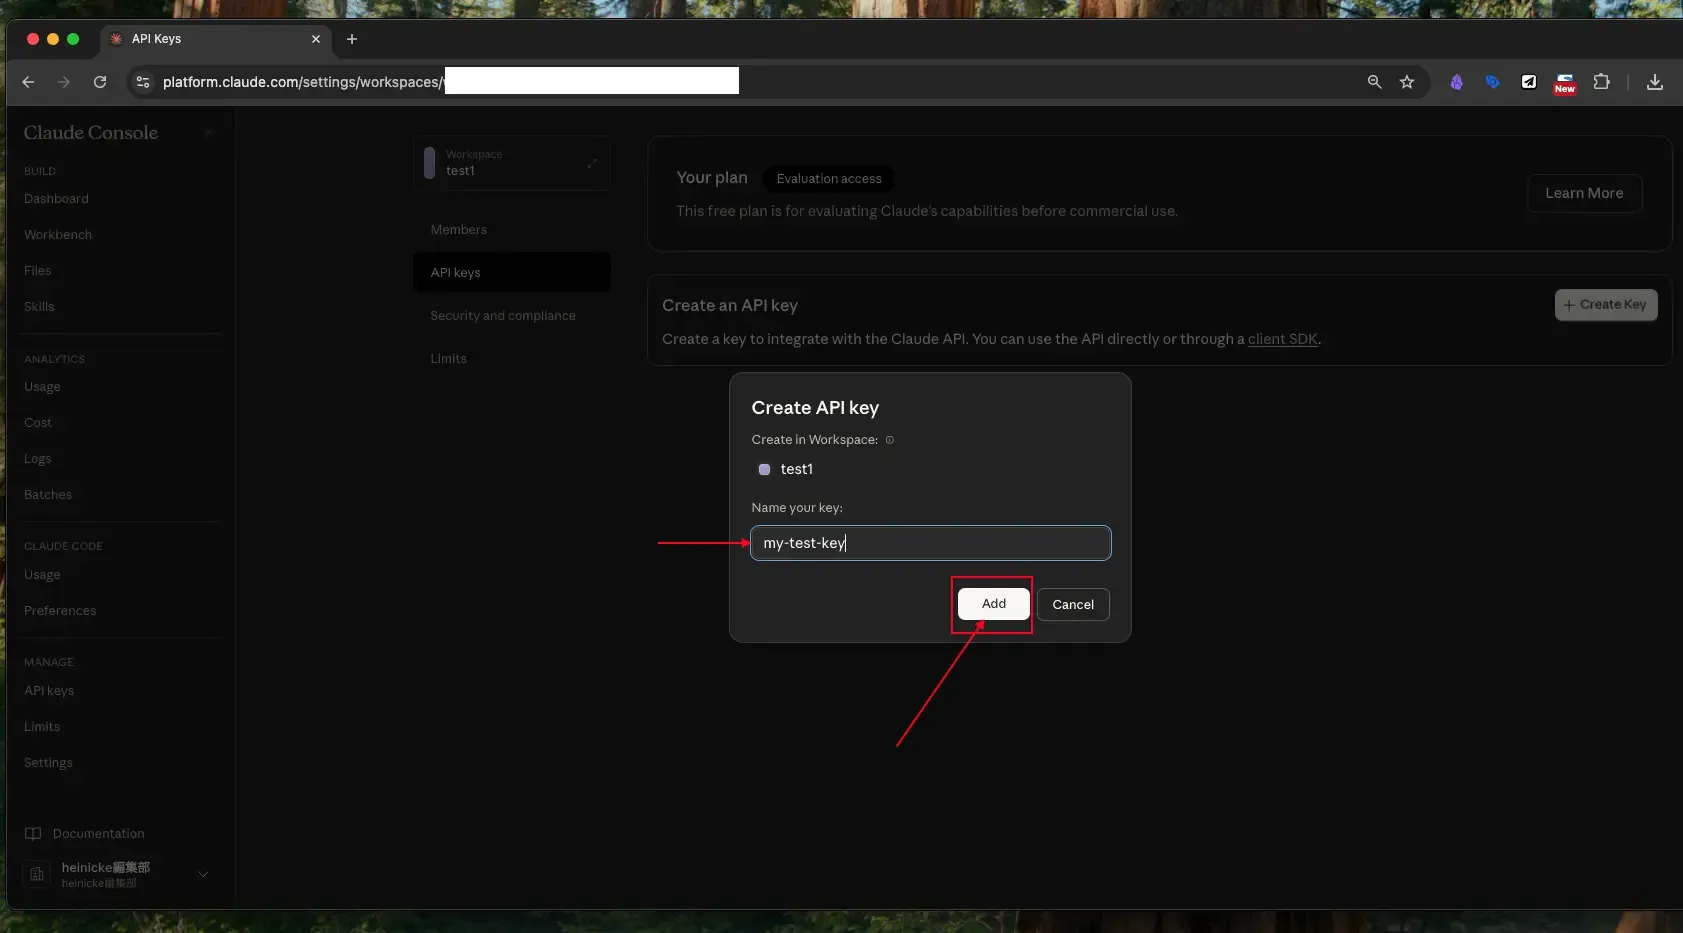 Enter a name for the API key and click "Add"
Step 15: Copy and Store the API Key
The API key will appear on screen. Once you close this screen, the key can never be shown again. Be sure to copy it and store it in a secure location right now.
When sharing the API key with an engineer, do not paste it directly into Slack, email, or chat. If those messages are ever leaked externally, the key could be misused. A safer method is to use a one-time secret sharing service such as https://onetimesecret.com/, which generates a link that can only be viewed once.
 The generated API key is displayed — copy it from this screen
Step 16: Confirm the Generated Key
On the API key list screen, confirm that the newly created key appears, along with its name and creation date.
 The generated API key is visible in the list
Step 17: Purchase Credits (Usage Fee)
Using the API key to access Claude incurs usage-based fees. You must purchase credits in advance.
To purchase: go to "API keys" → "Billing" → "Buy Credits" in the sidebar. Payment is made by credit card.
 Go to "Billing" → "Buy Credits" to purchase credits
Important Notes on API Key Security
An API key is effectively a key to your service account. If it is leaked, third parties could misuse it and generate significant unexpected charges. Follow these rules carefully:
- Never paste an API key directly into Slack, email, or chat — Use a one-time viewing service like https://onetimesecret.com/ to share it securely
- Never include an API key in source code repositories like GitHub — Confirm this with the engineer as well
- Revoke keys that are no longer needed — This can be done from the API key list screen
- Regularly review your usage — Check the "Billing" screen for any unexpected activity
Summary
Here is a recap of the steps to get a Claude API key:
- Create an account at the Anthropic Console (https://console.anthropic.com/)
- Create a workspace to manage keys by project
- Generate an API key within the workspace
- Copy and store the API key securely, then share it with the engineer
- Purchase credits to start using the API
The entire process takes just a few minutes. When PMs are comfortable with these steps, they can collaborate more efficiently with engineers and help accelerate the integration of AI capabilities.
Gallery